Create Your First Drop
A “drop” is a batch of items the Sales Assistant posts to Instagram and runs for you. Here’s how to create your first one — from photos to posted.
- Click Create a Drop, confirm your settings, and upload your photos.
- Upload PNGs or JPEGs (not HEIC), and upload photos in the order you shot them, so each item’s photos stay together.
- Review and edit, then post now or save as a draft.
Prefer to watch? Here’s a quick video walkthrough of creating your first drop.
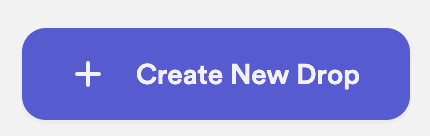
Step 1: Click Create a Drop
From your Sales Assistant Dashboard, click Create a Drop to start.
Step 2: Confirm your drop settings
Your default settings (from Setup) are pre-filled — bidding on or off, auction length (6, 12, or 24 hours), and whether Buy It Now is enabled. Adjust them for this drop if you like, then continue.
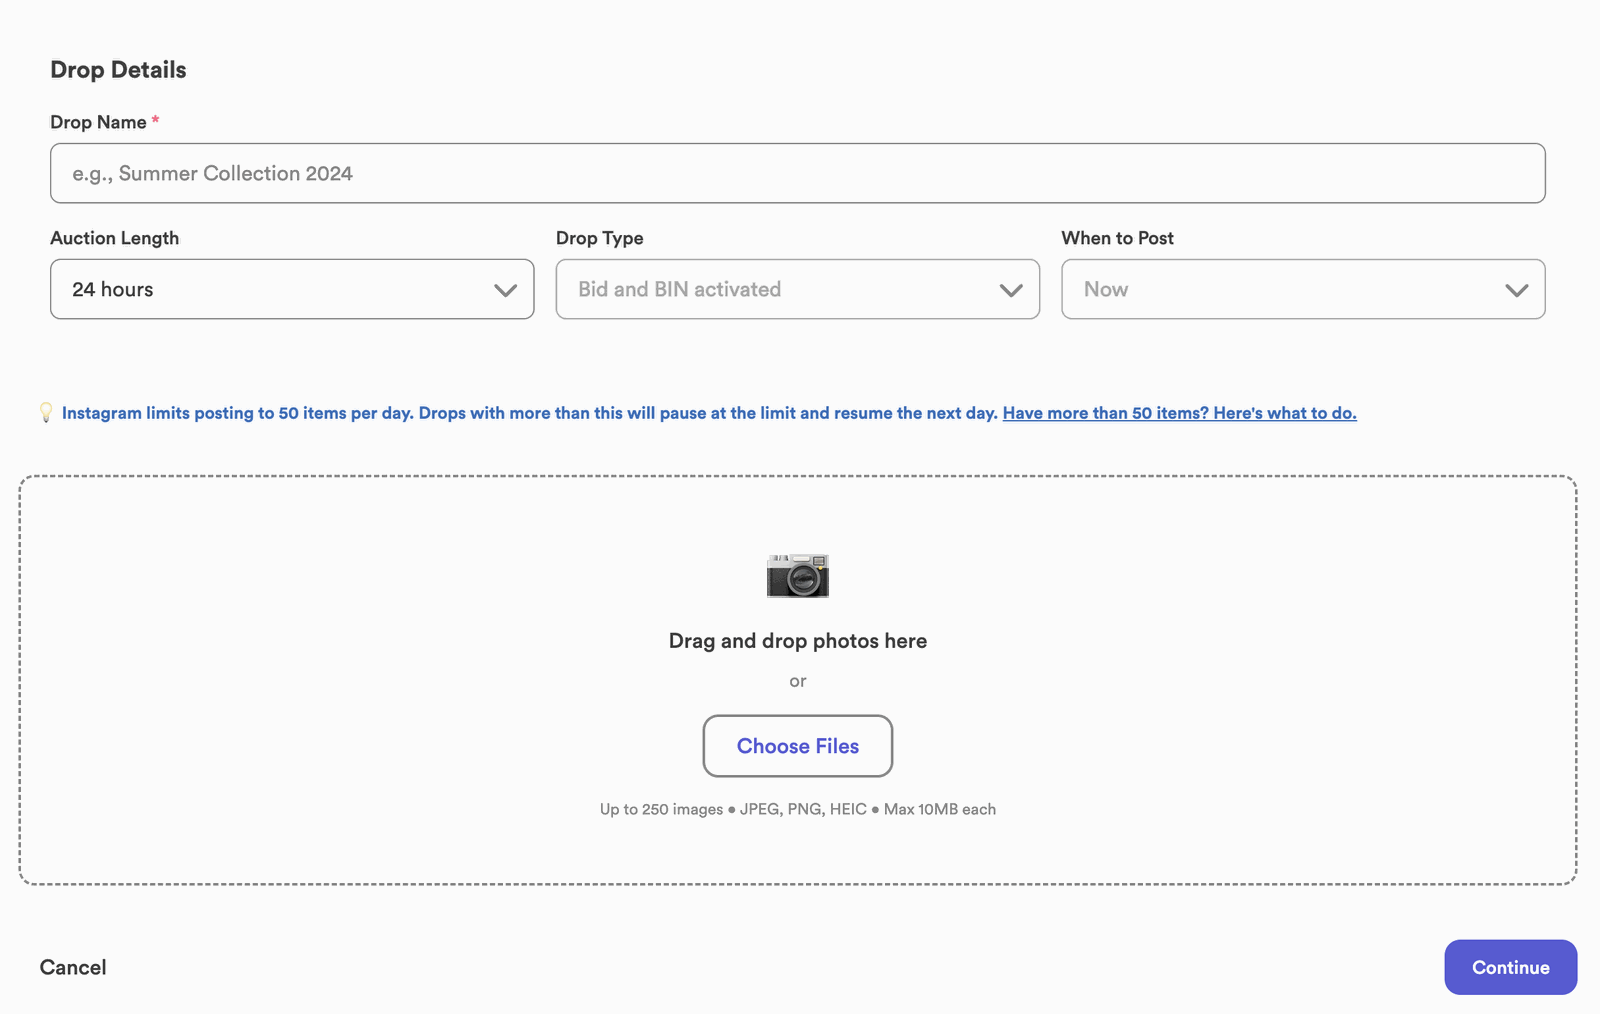
Step 3: Upload your photos
Add the photos for every item in your drop. Two things make this go smoothly:
Step 4: Review and edit
Before posting, you can fine-tune the whole drop — reorder photos, change the posting order, edit the captions, and set each item’s price. See How Captioning Works for the details.
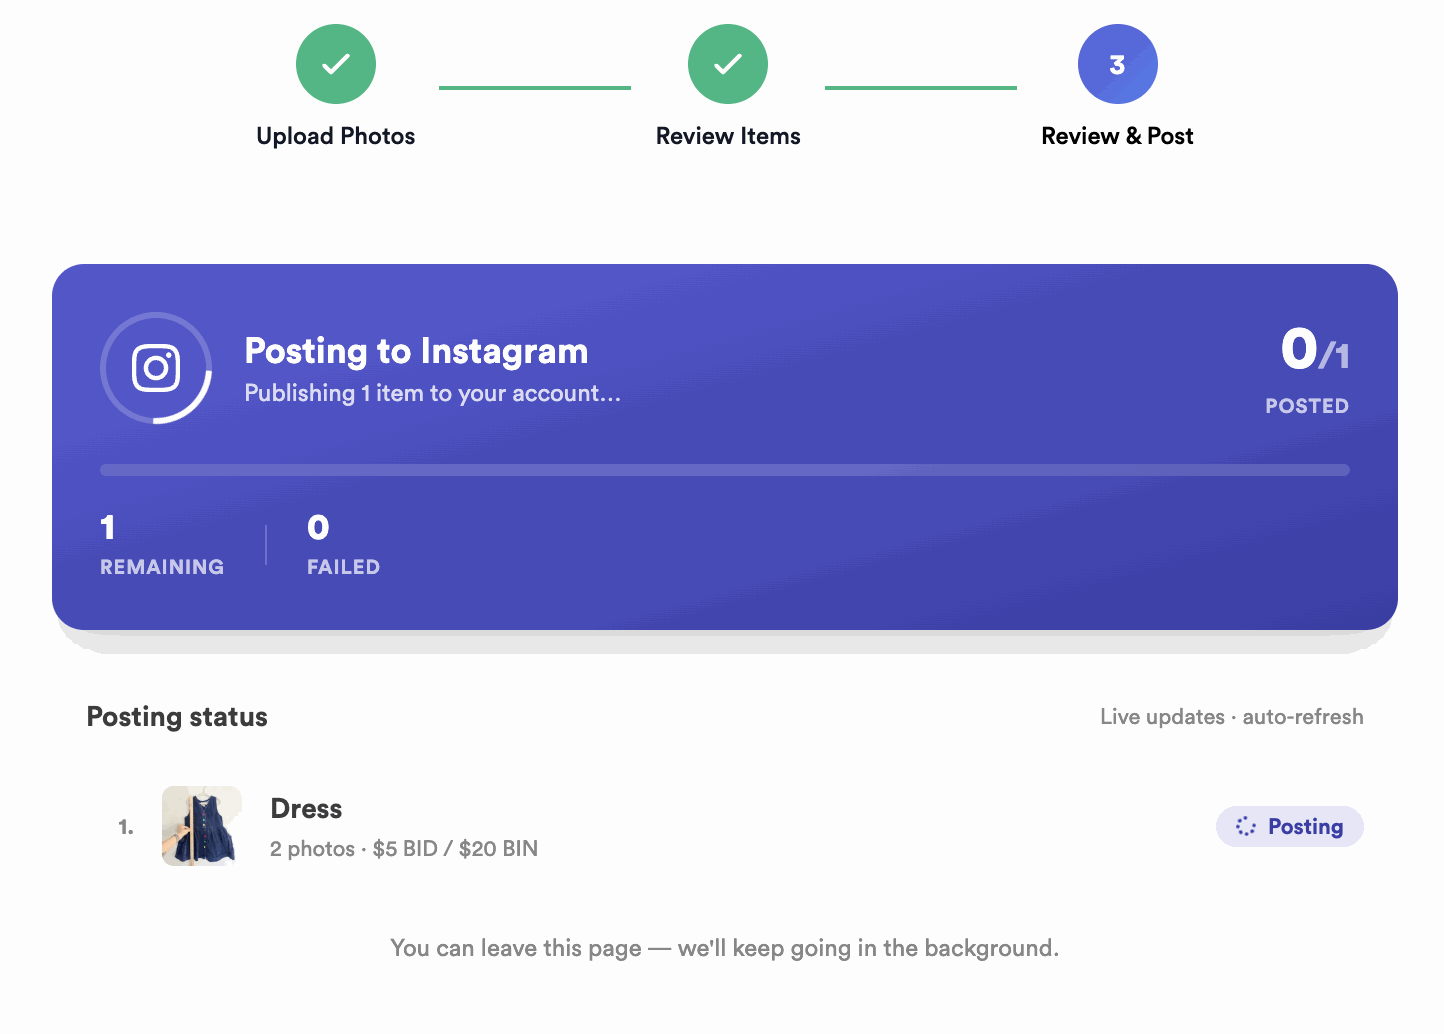
Step 5: Post now, or save as a draft
When everything looks right, post the drop — or keep it as a draft to finish later. Once it’s live, the Sales Assistant posts each item to Instagram and starts watching the comments.
Common questions
Why shouldn’t I upload HEIC files?
HEIC (the default iPhone format) doesn’t upload reliably. Use PNG or JPEG so every photo comes through.
Does photo order matter?
Yes — each item becomes its own post, and photos are grouped in upload order. Keep each item’s photos together so they land on the right post.
Can I save a drop and post later?
Yes — save it as a draft and post whenever you’re ready.
Ready? Head to your dashboard and create your first drop — reach out if you get stuck.